Did ya miss me!?
I haven’t had a whole lot of free time lately… and the time I did have I was busy with secret projects. But this week I mailed 4 packages chock full of handmade goodness. I tried a bunch of new things too! I’m not so good at taking pictures while I’m trying to figure stuff out, but I think I’ll make it work… just gotta wait until things are delivered so I don’t spoil the surprises!
Today I was determined to make a pattern I picked up a week ago at the quilt shop: the Pearl pattern by Swoon. It’s pretty rare that I can sit down and get something done, start to finish, so that was my goal. AND, only use what I had on hand! I bought it before I knew much about it, so when I got home I opened it up and started reading through the directions. I just did NOT get it. So I did some googling and hashtag searching. Turns out, this clutch has 2 main parts: the zipper compartment and the card slots. It’s put together in an interesting way: you actually make 2 separate pieces and stick them together! It looks so complicated but it’s really fairly simple.

First, I cut out all the parts. Here’s my pile-o-interfacing and fabric and pattern pieces. I used a couple scraps of Kokka canvas I’d been hoarding: pink scooters and blue cameras. The scooter print was fun to use for this– the scooters, the blue/purple polka dots and green stripes are all part of the same piece of fabric. It made the project look scrappy even when it wasn’t. For the inside I used a grey floral that just seems to go with everything.
I will say since I used such a thick exterior fabric the interfacing seemed like overkill. I could probably have skipped a few layers. Actually the pattern called for 2 different interfacings but then only used one. Next time I’ll use the lighter-weight interfacing.
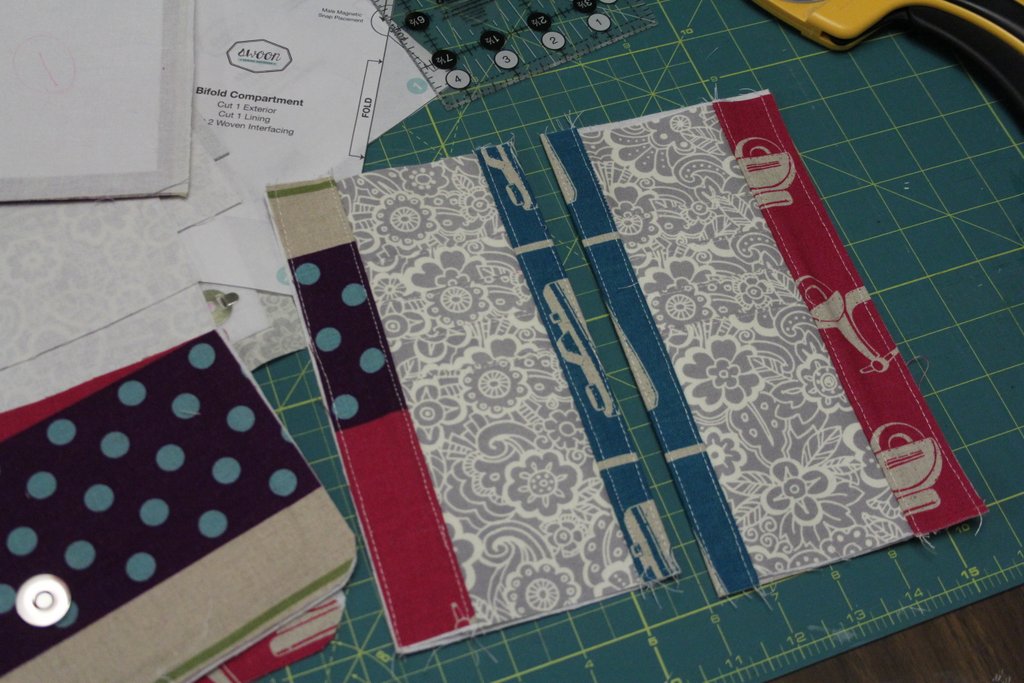
The card pockets ended up really nice! You make 1 wide card pocket and then cut it in half! Worked great!
There are a lot of instructions and clear diagrams. I had a hard time picturing what was happening and why but I followed the instructions to a “T” and it worked out.
Here’s what I ended up with:

So, as for the 2-parts thing… The top/left half of the card slots is a separate piece from the zipper pouch and the lower/right card slots in the picture below:

I don’t think I could have lined up the tops and bottoms of the cameras like that if I had tried!

The pieces aren’t meant to be used separately, I think they’re like that for constructibility but also for lots of extra pockets and stiffness. I only explain because It’s just something I didn’t really understand until I saw a bunch of pictures.
In this picture you can see where the bifold portion fits into the sleeve on the main half. There’s even another magnetic snap in there to keep things together.
Anyway, turned out super cute and I’ve already transferred all my wallet stuff into my new wallet! Love that it’ll fit a phone in there too!